Vintage Sneaker Restoration: Bringing Old Kicks Back to Life
Restoring vintage sneakers involves a careful combination of material assessment, cleaning, and structural refurbishment. Over time, even the best-kept pairs show signs of wear such as sole separation, midsole discoloration, and frayed laces. For enthusiasts and collectors, bringing these old models back to a wearable or display-ready condition requires understanding the original construction methods and selecting appropriate restoration approaches. Each step in the process contributes to preserving the sneaker’s character while addressing functional and aesthetic concerns.
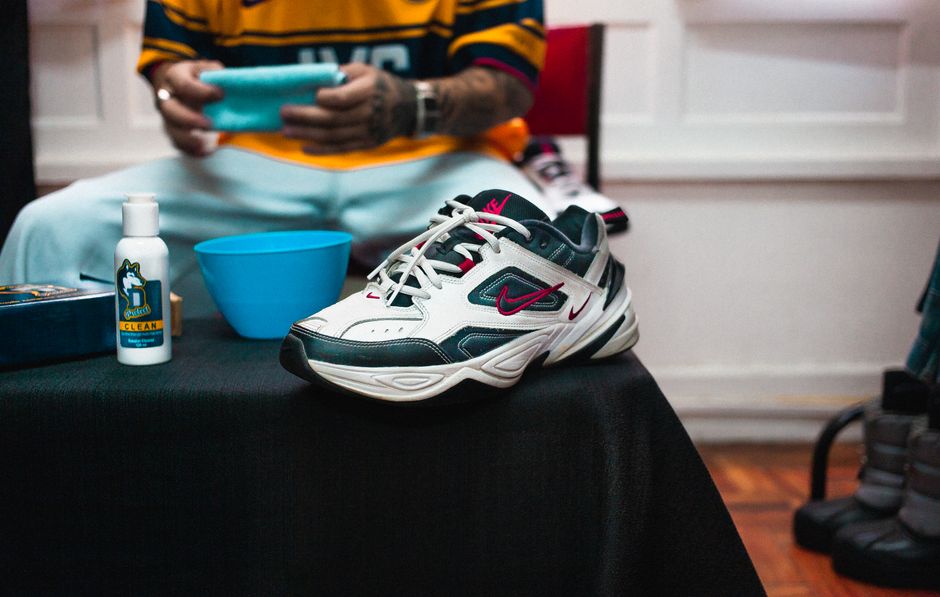
Kicks Chronicle often highlights how restoration differs from simple cleaning. While cleaning removes surface dirt and stains, restoration addresses underlying issues like degraded rubber, cracked leather, or weakened stitching. The goal is not to make a sneaker appear brand new but to extend its lifespan and maintain its historical integrity. Restorers typically work with a variety of tools and materials, from gentle solvents to adhesive compounds, each chosen based on the sneaker’s specific needs.
Before beginning any restoration project, it is important to evaluate the condition of the sneaker thoroughly. Factors such as the type of sole material, the age of the midsole foam, and the state of the upper fabric or leather guide the techniques that can be applied. This initial assessment helps in planning the sequence of repairs and in selecting the right products without causing additional damage.
Assessing Material Condition and Compatibility
Every vintage sneaker presents unique challenges depending on the materials used in its original production. Rubber soles from the 1980s, for example, often harden or become brittle over decades, while polyurethane midsoles may crumble due to hydrolysis. Leather uppers can develop cracks or lose their original finish, and synthetic mesh may become stiff or fray. Understanding these material behaviors allows restorers to choose treatments that are both effective and safe.
Compatibility between restoration products and the original materials is a primary concern. For instance, certain adhesives work well with rubber but may damage foam midsoles. Similarly, paints designed for flexible surfaces are necessary for midsole repainting to avoid cracking when the shoe flexes. Restorers often test products on inconspicuous areas first to observe reactions before applying them to visible parts. This cautious approach reduces the risk of irreversible changes.
The age of the sneaker also influences how it responds to restoration. Older materials may have lost their original flexibility, so processes like heating or stretching must be done gently. Some restorers use conditioners specifically formulated for vintage rubber to restore some elasticity before attempting sole repairs. Documenting the sneaker’s condition before starting provides a reference point for evaluating progress and outcomes throughout the restoration.
Sole Repair Techniques and Adhesive Application
One of the most common issues in vintage sneakers is sole separation, where the outsole detaches from the midsole or upper. This occurs when the original glue breaks down over years of storage or wear. Repairing this separation involves cleaning both surfaces, applying the correct adhesive, and clamping the parts until the bond sets. Many restorers use a combination of contact cement and industrial-strength adhesive designed for footwear.
Preparation of the bonding surfaces is a critical step. Any old glue residue, dirt, or oxidation must be removed to allow the new adhesive to adhere properly. Light sanding with fine-grit paper helps create a mechanical bond, while cleaning with isopropyl alcohol or a solvent eliminates oils and contaminants. After cleaning, the surfaces are allowed to dry completely before applying adhesive. Even application with a brush or spatula ensures uniform coverage without excess that might seep out when clamped.
Clamping pressure and curing time vary depending on the adhesive used. Some restorers use spring clamps or rubber bands to hold the sole in place for 24 to 48 hours. Environmental factors such as temperature and humidity can affect curing, so a controlled drying area is recommended. In cases where the sole is severely warped or cracked, partial replacement of sections may be necessary rather than a full regluing, although that involves sourcing compatible materials and careful cutting.
Midsole Repainting: Color Matching and Application
Midsole repainting is often required when the original finish has yellowed, scuffed, or worn unevenly. The process begins with cleaning the midsole to remove dirt and loose particles. Some restorers use a mild degreaser followed by light sanding to create a surface that paint can grip. Masking tape protects the upper and outsole from accidental paint application during the process.
Color matching is a significant challenge, especially for off-white or cream shades common in vintage models. Many restorers mix custom colors using acrylic paints designed for flexible surfaces or use specialized sneaker paint brands that offer a range of vintage hues. Applying several thin coats rather than one thick coat helps achieve an even, durable finish. Each coat should dry thoroughly before the next is applied, with light sanding between coats to smooth any imperfections.
After the final coat, a sealant or topcoat designed for flexible use can be applied to protect the paint from scuffing and UV exposure. The choice of sealant depends on whether the sneaker will be worn or displayed. For wearable pairs, a matte or satin finish is often preferred to maintain a natural look. Restorers note that repainted midsoles may still show wear over time, so periodic touch-ups may be needed depending on use and storage conditions.
Lace Replacement and Hardware Considerations
Replacing laces is one of the simplest yet most effective ways to refresh a vintage sneaker’s appearance. However, choosing the right replacement involves more than just matching the length and color. The original laces on many vintage models had specific widths, thicknesses, and weave patterns that contributed to the overall aesthetic. Flat cotton laces, round polyester laces, or padded laces each convey a different look and feel.
Hardware such as lace eyelets, hooks, and lace tips can also be addressed during restoration. Metal eyelets that have rusted or become deformed may be replaced with similar-sized eyelets using a setting tool. For sneakers with lace loops or plastic lace locks, sourcing period-correct replacements can help maintain authenticity. Some restorers choose to keep original hardware if it is still functional, cleaning it gently with a brass brush or a mild polishing compound.
Lacing techniques can also affect how the restored sneaker fits and appears. Some vintage models were originally laced in a specific pattern, such as straight bar lacing or skip lacing, which restorers may replicate for historical accuracy. When laces are replaced, the ends should be trimmed and sealed to prevent fraying. Heat-sealing with a lighter or using lace tips helps keep the ends neat and prolongs the life of the new laces.
Preservation and Storage After Restoration
Once restoration is complete, proper storage becomes essential to maintain the results. Exposure to light, especially UV rays, accelerates yellowing and material degradation. Storing restored sneakers in a cool, dark place with moderate humidity helps slow down these processes. Acid-free tissue paper or shoe trees can help retain the shape of the upper and prevent creasing.
For collectors who choose to display their sneakers, UV-protective acrylic cases provide a barrier against dust and light while allowing visibility. If the sneakers will be worn, rotating them and avoiding prolonged exposure to moisture or extreme temperatures can extend the life of the restoration. Regular inspection for signs of adhesive failure or paint wear allows for early intervention before small issues become larger problems.
Kicks Chronicle emphasizes that restoration is a continuous learning process. Each pair of vintage sneakers offers insights into different manufacturing techniques and material behaviors. By understanding the methods and respecting the original design, restorers can bring old kicks back to life while honoring the craftsmanship that made them iconic in the first place.